Creating and Managing WorkGroups
FAQ: How do I create a WorkGroup in Corada?
Creating a WorkGroup in Corada is quick and easy!
Here are the steps:
1. Once logged into Corada, click on "My WorkGroups" at the top of the home page.
2. Click on "+ Create a New WorkGroup."
3. Enter a name for the WorkGroup.
4. Browse to attach a logo or image to the WorkGroup (optional).
5. Click on "YES/NO" toggles to configure the WorkGroup's settings.
6. Click the "Save WorkGroup" button.
Note: This feature is available to Premium- and Accessibility Specialist-level subscribers only. Need to upgrade your subscription? Click here!
FAQ: How many WorkGroups may I create or own?
-
Users with a Premium subscription may create or own up to 3 WorkGroups.
-
User with an Accessibility Specialist subscription may create or own up to 12 WorkGroups.
FAQ: How many WorkGroups may I join?
Users with a Premium or higher subscription may join an UNLIMITED number of WorkGroups.
FAQ: How do I invite members to join my WorkGroup?
Inviting people to join your WorkGroup in Corada is quick and easy! ANYONE may be invited to a WorkGroup, as long as they have an email address. Upon receipt of the invitation, they will be prompted to either login to accept, sign up for a Premium or Accessibility Specialist subscription, upgrade their current subscription, or decline the invitation.
Here are the steps:
1. Once logged into Corada, click "My WorkGroups" at the top of the home page.
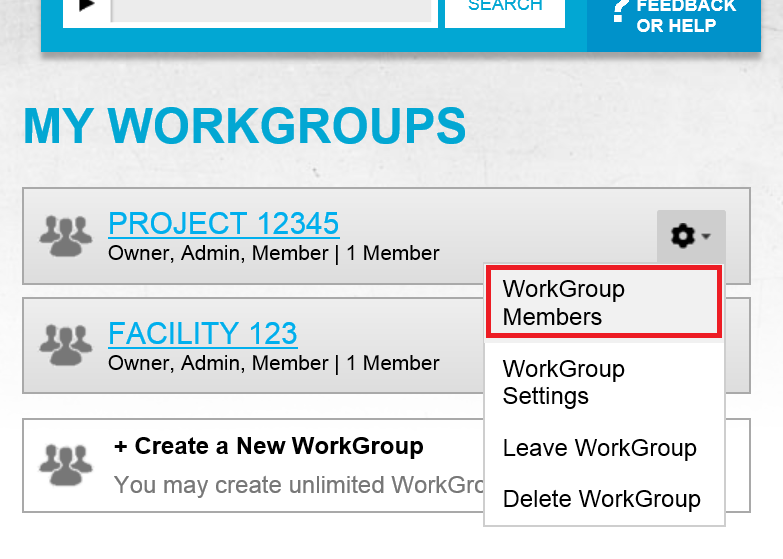
2. Click the cog menu to the right of the name of the WorkGroup to which you would like to invite members. Select the menu option "WorkGroup Members," as shown below:
3. Click "Invite a new Member under "Pending Invitations."
4. Type or paste in the email address of the person that would like to invite. (They will receive an email with instructions for accepting, signing in, signing up, upgrading or declining the invitation).
5. Type in the person's name (optional).
6. Select the level of permission you would like to assign the user: either "Member" or "Admin." (You may edit these settings at any time, to change Members to Admins or vice versa).
-
"Admin" permissions will give a user administrative rights to the WorkGroup, including:
-
Editing the WorkGroup's name and settings
-
Inviting or removing WorkGroup members
-
Reviewing and posting content to the WorkGroup
-
7. Click the "Create Invitation" button.
8. To invite additional members, repeat the steps. You may invite an unlimited number of members to join your WorkGroup.
-
Want to invite a large number of people to join your WorkGroup? If you would like to invite a large number of people to join your WorkGroup, and would like the Corada staff to enter this information and create a "batch invitation," please Contact Us! We would be happy to upload your Excel spreadsheet of invitees and send these invitations for you!
FAQ: How do I edit my WorkGroup's settings?
1. Once logged into Corada, click on "My WorkGroups" at the top of the home page.
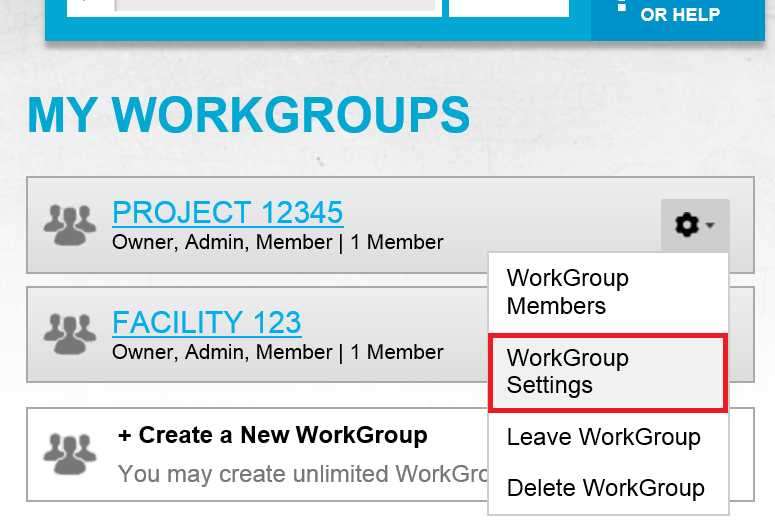
2. Click the cog menu to the right of the name of the WorkGroup for which you would like to edit settings. Select the menu option "WorkGroup Settings," as shown below:
3. Click "Edit Settings."
4. Make any necessary changes.
5. Click the "Update WorkGroup" button.
User Comments/Questions
Add Comment/Question