
ADA Checklist for Existing Facilities
The Americans with Disabilities Act (ADA) requires state and local governments, businesses, and non-profit organizations to provide goods, services, and programs to people with disabilities on an equal basis with the rest of the public.

Checklist
Recreational Checklists
Some people think that only new construction and alterations need to be accessible and that older facilities are “grandfathered,” but that’s not true. Because the ADA is a civil rights law and not a building code, older facilities are often required to be accessible to ensure that people with disabilities have an equal opportunity to participate.
The ADA has different requirements for state and local governments and for places of public accommodation (businesses and non-profit organizations that provide goods to or serve the public).
State and local governments (ADA title II entities) must ensure “program accessibility.”
Public accommodations (ADA title III entities) must remove structural and communication barriers where it is “readily achievable” to do so.

ADA National Network · www.ADAta.org
Questions on the ADA call 800-949-4232 voice/tty
Questions on the checklist: 617-695-0085 voice/tty or ADAinfo@NewEnglandADA.org
This website and checklist were produced by the New England ADA Center, a project of the Institute for Human Centered Design and a member of the ADA National Network. This website and checklist were developed under a grant from the Department of Education, NIDRR grant number 90DP0087. The contents do not necessarily represent the policy of the Department of Education, and you should not assume endorsement by the Federal Government. Copyright © 2017 ADA Checklist for Exiting Facilities. You can freely reproduce and distribute this content. Include proper attribution. But you must get permission before using this content as a fee-based product.
How to Use this Checklist
Get Organized
One person can conduct a survey, but it’s easier with two people. One person can take measurements and the other person can fill out the checklist and take photos.
Obtain Floor Plan or Make Sketch
A floor plan helps the surveyors to get organized and to know how many elements there are, such as entrances and toilet rooms. If plans are not available, sketch the exterior and interior layout of interior and exterior spaces and mark the elements on the sketch.
Make Copies of the Checklist
Determine how many copies of each section of the checklist you need. For example, most facilities have more than one toilet room.
Gather Tools
-
Checklist
-
Clipboard makes it easier to write on the checklist
-
Tape measure
-
Electronic or carpenter’s level - 24 inches
-
Door pressure gauge or fish scale for measuring door-opening force
-
Digital camera
-
Bag to hold these items
Start Outside
Start from site arrival points such as drop-off areas and sidewalks. Determine if there is an accessible route to an accessible entrance. If there is a parking lot or garage check for the correct number of accessible parking spaces, including van-accessible spaces. Is there an accessible route from the accessible parking spaces to an accessible entrance? Next survey the entrances. If there is an accessible entrance, determine if there are signs at inaccessible entrances directing people to the accessible entrance. Go inside and continue through the facility.
Keep Good Notes
Write on the front of each checklist where you are surveying. You may end up with six toilet room checklists. When you get back to your office you’ll want to know which one is the checklist for the first floor women’s room. If there isn’t an accessible entrance you’ll want to indicate how many steps there are and how much space is available to install a ramp or lift. This is a good time to take photographs.
Take Good Measurements
When in doubt write it down. It’s better to have too much information than not enough. Even if something is in compliance it’s helpful to have exact measurements.
Parking Spaces
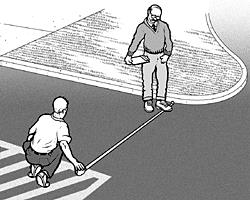
Measure from the center of marking lines. If lines are not adjacent to another space or aisle the measurement can be to the full width of the line.
Door Clear Width
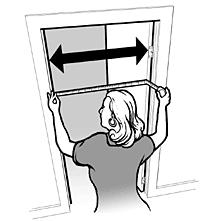
Open the door 90 degrees, measure from the face of the door to the edge of the door stop.
Door Opening Force
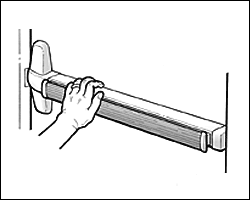
If you’re using a door pressure gauge, place it where you would push open the door.
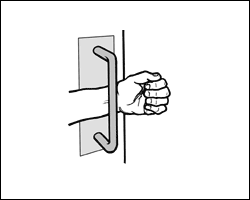
If you’re using a fish scale, place it where you would pull open the door.
Accessible Slopes
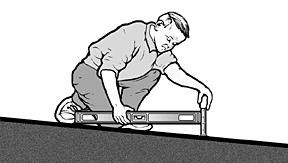
You can measure slope with a 24 inch level and a tape measure. Put the level on the surface in the direction you are measuring. Put one end at the high point of the surface and raise the other end so that the bubble is in the middle of the level’s gauge. The level is now level. Measure the distance between the end of the level at its bottom point and the surface.
For a ramp the maximum running slope allowed is 1:12. That means for every inch of height change there should be at least 12 inches of ramp run. If the distance between the bottom of the level and the ramp surface is 2 inches or less, then the slope is 1:12 or less (2:24 = 1:12 and 1.5:24 = 1:16 which is a more gradual slope than 1:12). If the distance is greater than 2 inches, the ramp is too steep. For example, if the distance is 3 inches, then the slope is 1:8 (3:24 = 1:8 which is a steeper slope than 1:12).
For the parts of an accessible route that aren’t a ramp, the maximum running slope allowed is 1:20. That means for every inch of height change there must be at least 20 inches of route run. The distance from the bottom edge of the level to the surface should be no more than 1.2 inches (1.2:24 = 1:20).
For the cross slope of an accessible route the maximum slope allowed is 1:48. The distance from the bottom edge of the level to the surface should be no more than ½ inch (.5:24 = 1:48). The cross slope of an accessible route is the slope that is perpendicular to the direction of pedestrian travel.
Slopes may also be measured using a digital level. Be sure to read the instructions. Measure with the percent calculation rather than the degrees calculation. For a ramp the maximum running slope allowed is 8.33% (8.33% is a 1:12 slope). For an accessible route without a ramp the maximum running slope allowed is 5% (1:20). For the cross slope of an accessible route the maximum slope allowed is 2.083% (1:48).
Check that You Got Everything
Before you leave the site review all the checklists. Make sure you know which checklist goes with which entrance and which toilet room and that you’ve got all the information you need. It is better to do it now than to have to go back.
List Barriers and Solutions
Consider the solutions listed beside each question on the checklist and add your own ideas. Consult with building contractors and equipment suppliers to estimate the costs for making modifications.
Develop a Plan
State and local governments were required to develop a Transition Plan six months after the ADA went into effect (1993!). Conducting a current survey is a good opportunity to update the plan.
Although places of public accommodation are not required to have a plan, the Department of Justice recommends one: "...Such a plan...could serve as evidence of a good faith effort to comply..."
Prioritize items, make a timeline, decide who is responsible to carry out the plan and develop a budget.
Make Changes
Use the 2010 ADA Standards for Accessible Design. Check whether local and state building codes require greater accessibility when alterations are undertaken.
Follow Up
Review the implementation plan each year to evaluate whether more access improvements have become readily achievable.
What is Program Accessibility?
State and local governments must ensure that services, programs and activities, when viewed in their entirety, are accessible to people with disabilities. This is part of public entities’ program accessibility obligations. Alterations to older buildings may be needed to ensure program accessibility. Generally this is a greater obligation than “readily achievable barrier removal” the standard that applies to public accommodations. State and local governments are not required to take any action that would result in undue financial and administrative burdens.
State and local governments’ ADA obligations for program accessibility are in the Department of Justice’s ADA title II regulations 28 CFR Part 35.150.
What is Readily Achievable Barrier Removal?
The Americans with Disabilities Act (ADA) requires public accommodations (businesses and non-profit organizations) to provide goods and services to people with disabilities on an equal basis with the rest of the public.
Businesses and non-profit organizations that serve the public are to remove architectural barriers when it is “readily achievable” to do so; in other words, when barrier removal is “easily accomplishable and able to be carried out without much difficulty or expense.”
The decision of what is readily achievable is made considering the size, type, and overall finances of the public accommodation and the nature and cost of the access improvements needed. Barrier removal that is difficult now may be readily achievable in the future as finances change.
This checklist is intended to assist public accommodations as the first step in a planning process for readily achievable barrier removal.
Public accommodations’ ADA obligations for barrier removal can be found in the Department of Justice’s ADA Title III regulations 28 CFR Part 36.304.
Priorities for Accessible Facilities
The checklist follows the four priorities in the Department of Justice ADA title III regulations. These priorities are equally applicable to state and local government facilities.
-
Priority 1 - Accessible approach and entrance
-
Priority 2 - Access to goods and services
-
Priority 3 - Access to public toilet rooms
-
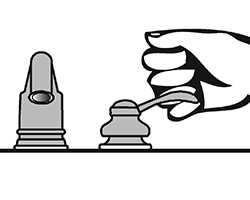
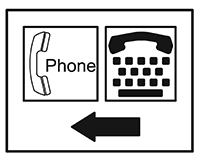
Priority 4 - Access to other items such as water fountains and public telephones
2010 ADA Standards for Accessible Design
This checklist is based on the 2010 ADA Standards for Accessible Design (2010 Standards). The specifications are in this checklist to help determine what may be readily achievable barrier removal for existing facilities. This checklist does not include all sections of the 2010 Standards. For example there are no questions about patient rooms in hospitals or guest rooms in hotels. Consult the 2010 Standards for situations not covered in the checklist. Full compliance with the 2010 Standards is required only for new construction and alterations. The web address for the 2010 Standards is in the Resources section.
Safe Harbor – Construction Prior to March 15, 2012
Elements in facilities built or altered before March 15, 2012 that comply with the 1991 ADA Standards for Accessible Design (1991 Standards) are not required to be modified to specifications in the 2010 Standards. For example, the 1991 Standards allow 54 inches maximum for a side reach range to a control such as the operating part of a paper towel dispenser. The 2010 Standards lower that side reach range to 48 inches maximum. If a paper towel dispenser was installed prior to March 15, 2012 with the highest operating part at 54 inches, the paper towel dispenser does not need to be lowered to 48 inches. Since the dispenser complies with the 1991 Standards, that Standard provides a “safe harbor.”
Elements in the 2010 ADA Standards Not in the 1991
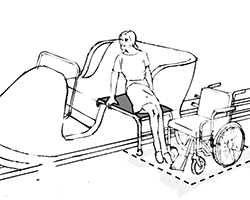
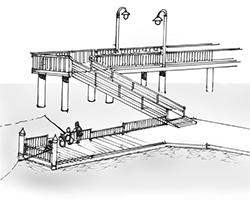
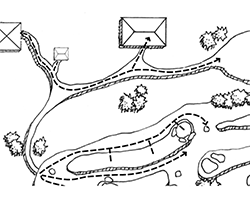
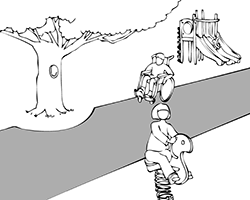
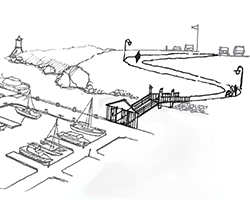
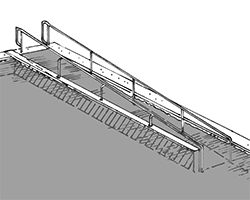
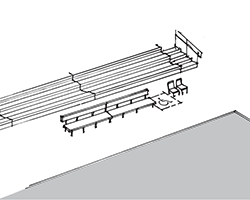
The 2010 Standards contain elements that are not in the 1991 Standards. These elements include recreation facilities such as swimming pools, team and player seating, accessible routes in court sports facilities, saunas and steam rooms, fishing piers, play areas, exercise machines, golf facilities, miniature golf facilities, amusement rides, shooting facilities with firing positions, and recreational boating facilities. Because these elements are not in the 1991 Standards, they are not subject to the safe harbor exemption. Public accommodations must remove architectural barriers to these items when it is readily achievable to do so. For example, a hotel must determine whether it is readily achievable to make its swimming pool accessible by installing a lift, a sloped entry or both as specified in the 2010 Standards. State and local governments must consider accessibility improvements to these recreation areas to ensure “program accessibility.” For example a town must look at its play areas and determine which should be made accessible.
What this Checklist is Not
The ADA title II and III regulations require more than program accessibility and barrier removal. The regulations include requirements for nondiscriminatory policies and practices and for the provision of auxiliary aids and services, such as sign language interpreters for people who are deaf and material in Braille for people who are blind. This checklist does not cover those requirements.
Since this checklist does not include all of the 2010 Standards it is not intended to determine compliance for new construction or alterations.
What are Public Accommodations?
Under the ADA public accommodations are private entities that own, lease, lease to or operate a place of public accommodation. This means that both a landlord who leases space in a building to a tenant and the tenant who operates a place of public accommodation have responsibilities to remove barriers.
A place of public accommodation is a facility whose operations affect commerce and fall within at least one of the following 12 categories:
-
Places of lodging (e.g., inns, hotels, motels, except for owner-occupied establishments renting fewer than six rooms)
-
Establishments serving food or drink (e.g. , restaurants and bars)
-
Places of exhibition or entertainment (e.g. , motion picture houses, theaters, concert halls, stadiums)
-
Places of public gathering (e.g. , auditoriums, convention centers, lecture halls)
-
Sales or rental establishments (e.g. , bakeries, grocery stores, hardware stores, shopping centers)
-
Service establishments (e.g. , laundromats, dry-cleaners, banks, barber shops, beauty shops, travel services, shoe repair services, funeral parlors, gas stations, offices of accountants or lawyers, pharmacies, insurance offices, professional offices of health care providers, hospitals)
-
Public transportation terminals, depots, or stations (not including facilities relating to air transportation)
-
Places of public display or collection (e.g. , museums, libraries, galleries)
-
Places of recreation (e.g. , parks, zoos, amusement parks)Places of education
-
Places of education (e.g. , nursery schools, elementary, secondary, undergraduate, or postgraduate private schools)
-
Social service center establishments (e.g. , day care centers, senior citizen centers, homeless shelters, food banks, adoption agencies)
-
Places of exercise or recreation (e.g. , gymnasiums, health spas, bowling alleys, golf courses)
Resources
U.S. Department of Justice ADA Information
800-514-0301 voice
800-514-0383 TTY
www.ada.gov
ADA National Network
800-949-4232 voice/TTY connects to your regional ADA Center
www.adata.org
U.S. Access Board
800- 872-2253 voice
800-993-2822 TTY
www.access-board.gov
ADA Title III Regulations 28 CFR Part 36
www.ada.gov/regs2010/titleIII_2010/titleIII_2010_regulations.htm
2010 ADA Standards for Accessible Design
www.ada.gov/2010ADAstandards_index.html
1991 ADA Standards for Accessible Design
Tax Deductions and Credits for Barrier Removal
Acknowledgements
Many of the illustrations are from the U.S. Department of Justice and the U.S. Access Board or are based on illustrations produced by the U.S. Access Board and the U.S. Department of Justice.
Checklist
Editor's Note
The hyperlinks below point to the Checklists on Corada's Dropbox. You may download the Checklists directly from Dropbox as an MS Word document or a PDF.
Full Checklist

![man in wheelchair playing miniture [sic] golf](/images/18109)
User Comments/Questions
Add Comment/Question