Construction and Maintenance Practices
Even the best universal design can be ruined, often unintentionally, by construction or maintenance practices that turn accessible design features into barriers. Construction engineering and inspection personnel must have a thorough understanding of the design intent and of accessibility issues or they must check with the designer before allowing any deviations from the design. Field changes, such as increasing the slope on a walkway to reduce the cost of asphalt paving or increasing the drop at an exterior door threshold to reduce issues with driving rain, can make the entire project inaccessible.
Construction Tip
Avoid unintended consequences.
Consider accessibility when construction is in progress. Any change order intended to solve one problem could create another. For example, standard speed humps can slow speeding traffic in a campground, but they can also become barriers if the main pedestrian access route through the campground is the roadway. Stagger speed humps to block only one lane at a time or limit them to the center of the road, leaving 32 inches (815 millimeters) of clear passage at each side. Both of these approaches will slow traffic without blocking access.
Maintenance and operations activities can help or hinder accessibility. Provide information on accessibility when training maintenance personnel. When employees understand how their work can affect accessibility, they can look for ways to improve accessibility. For example, trained maintenance and recreation personnel will know not to put a chair or garbage receptacle beside the door of an accessible restroom stall that would prevent the door from opening fully and thus render the stall inaccessible. They will know that picnic tables fastened to the floor of a picnic shelter to prevent theft must be spaced far enough apart so that everyone can use them. They will know not to allow gravel walkway material to erode away from the entrance to a campground restroom, creating an elevation change that makes the restroom inaccessible (figure 27).
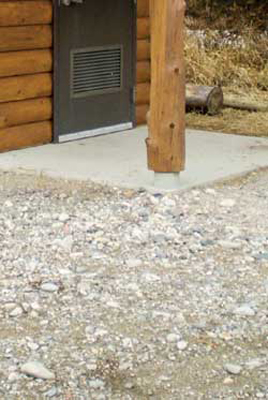
Figure 27—At this campground restroom entrance, the gravel walkway material has sunk or eroded, making the restroom inaccessible due to the difference in elevation between the walkway and the concrete.
Maintenance also can be an opportunity to improve accessibility. A series of small changes can make a big difference.
Design Tip
Use the VanHorn Roll to minimize maintenance.
Consider how time and normal weathering will affect accessibility when designing recreation areas. For instance, at the point where the concrete pad for a restroom meets the gravel outdoor recreation access route that connects it to the rest of the campground, gravel often erodes away from the concrete, leaving a drop in grade that doesn't meet accessibility requirements. Solve this problem by rolling the edge of the concrete down under the gravel surface of the outdoor recreation access route, as shown in figure 28. This is known as the "VanHorn Roll," named for the Unita-Wasatch-Cache National Forest recreation technician who invented the concept. A similar design can be used to keep the junction between asphalt and concrete surfaces accessible over time, as shown in figure 29.
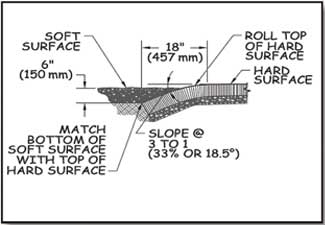
Figure 28—The VanHorn Roll is a design strategy to prolong the time a junction between concrete and gravel pedestrian surfaces meet the accessibility requirements without importing additional gravel to replace material that has eroded away.
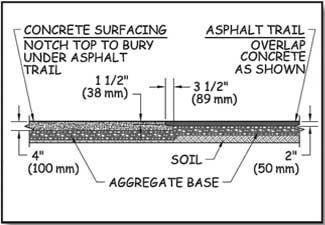
Figure 29—Differential settlement is less likely to occur between adjacent asphalt and concrete walking surfaces if the asphalt is overlaid onto a notch of the adjacent concrete surface.
Maintenance Tip
Improve accessibility through maintenance.
Improved accessibility doesn't always mean new construction or major renovation. Maintenance and routine service present many opportunities to improve accessibility.
An accessible surface is firm and stable. Use caution with the size and depth of gravel when maintaining unpaved surfaces. Generally, smaller gravel with some fine material can be compacted to a firmer surface than larger gravel or gravel that is all the same size. Depending on the surfacing material, mixing in some soil stabilizer may provide an accessible, natural-appearing surface.
Practical Approach
The surface is probably firm and stable if ruts are not left by:
-
Someone riding a bicycle with narrow tires
-
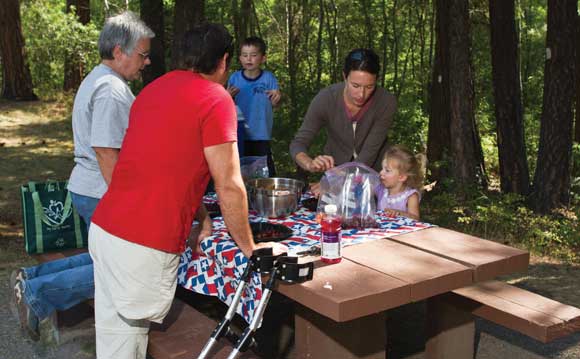
Someone pushing a 3-year-old in a folding stroller with small plastic wheels
On paved parking lots, designating the required accessible spaces is relatively easy when repainting the parking lot stripes, especially right after the lot has been seal-coated. Ensure that the appropriate wide, striped access aisles are provided next to each designated accessible parking space. The key to accessible parking is the striped zone next to it that ensures adequate space next to the vehicle to allow people to get into and out of their vehicle even if they use a wheelchair, crutches, or a walker.
Designating accessible parking spaces on gravel lots can be a problem because paint won't stay in place. If you designate accessible parking spaces only with a sign, designate end locations closest to the entrance. Ensure that accessible parking signs are 60 inches (1,524 millimeters) high and curb cuts are located appropriately—next to, not in the parking space or access aisle.
Building entries must be within ¼ inch (6.4 millimeters) of being flush with the grade of the outside access route and have a beveled doorsill that isn't more than ½ inch (13 millimeters) high. Sometimes it's fairly easy to add surfacing material, shim up the deck or porch boards, or use asphalt or concrete to bring the access route up to the building floor.
The surface at the base of water hydrants at recreation areas must be at least 72 inches (1,830 millimeters) by 48 inches (1,220 millimeters) and must be firm and stable. Consider building a grate and drain, or a paved surface, around hydrants if a soil or gravel surface can't be made firm and stable. If you don't have funding for a major site renovation, repair the area around a few hydrants at a time.
When operating controls need replacing, think about accessibility. To comply with accessibility guidelines, all controls must be operable by one hand without pinching, grasping, or twisting the wrist and with no more than 5 pounds (2.2 newtons) of pressure. When accessible parts are ordered, consider ordering extra parts for future replacements.
Practical Approach
If you can operate the control with one closed fist and with less than 5 pounds (2.2 newtons) of pressure, the control is accessible. Three ways to provide accessibility: push button, sensory-operated, and lever handle controls (figures 30, 31, and 32).
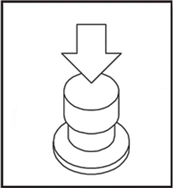
Figure 30—Push button control.
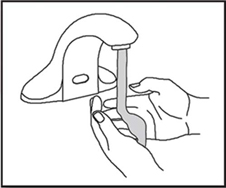
Figure 31—Sensory-operated control.
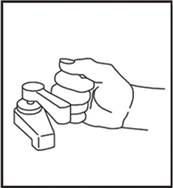
Figure 32—Lever handle control.
User Comments/Questions
Add Comment/Question